Brown Eyed Susan (Rudbeckia triloba) is a hardy perennial plant that can be used in many ways. It adds color and charm to gardens, wildflower fields, and landscapes. People who garden and landscape love this plant because of its beautiful yellow petals that circle a dark brown center. This guide will tell you everything you need to know about growing the “brown eyed susan plant” for its showy looks or collecting brown eyed susan seeds to make more of these beautiful flowers.
Introduction
The Rudbeckia triloba plant, which is also known as the Brown Eyed Susan, is in the Asteraceae family. The plant is often called the Three-Lobed Coneflower because its leaves have three lobes. This tough plant comes from the central and eastern United States. It does well in a wide range of places, from open woods to prairies.
Landscape designers and gardeners love the brown eyed susan because it blooms in late summer and early fall, drawing in pollinators like bees, butterflies, and birds. The brown eyed susan seeds are also simple to collect and store, which makes them a great choice for people who want to grow their own wildflower garden.
This article will talk about how to identify the brown eyed susan plant, how to plant it, how to care for it, and how to keep it in good shape. It will also go into great depth about how to collect and store brown eyed susan seeds. You will know everything you need to know to grow this beautiful plant successfully and enjoy it in your yard by the end of this guide.
Figures and Facts to Include
- Height: 2-5 feet
- Bloom Time: Late summer to early fall
- USDA Zones: 4-8
- Germination Time: 7-30 days
- Seed Viability: 2-3 years if stored properly
- Optimal Soil pH: 6.0-7.5
Plant Identification
- Scientific Name: Rudbeckia triloba
- Common Names: Brown Eyed Susan, Thin-Leaved Coneflower, Three-Lobed Coneflower
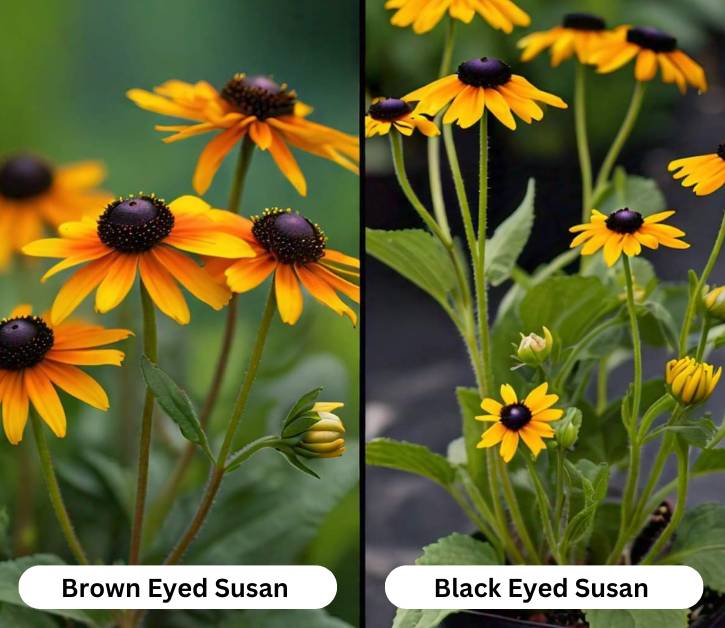
It is common for people to confuse the brown-eyed susan plant with its near sibling, the black-eyed susan, which is known scientifically as Rudbeckia hirta. The size of the flowers, the shape of the leaves, and the overall growth pattern of the two species can, nevertheless, be used to differentiate between them.
1. Physical Characteristics
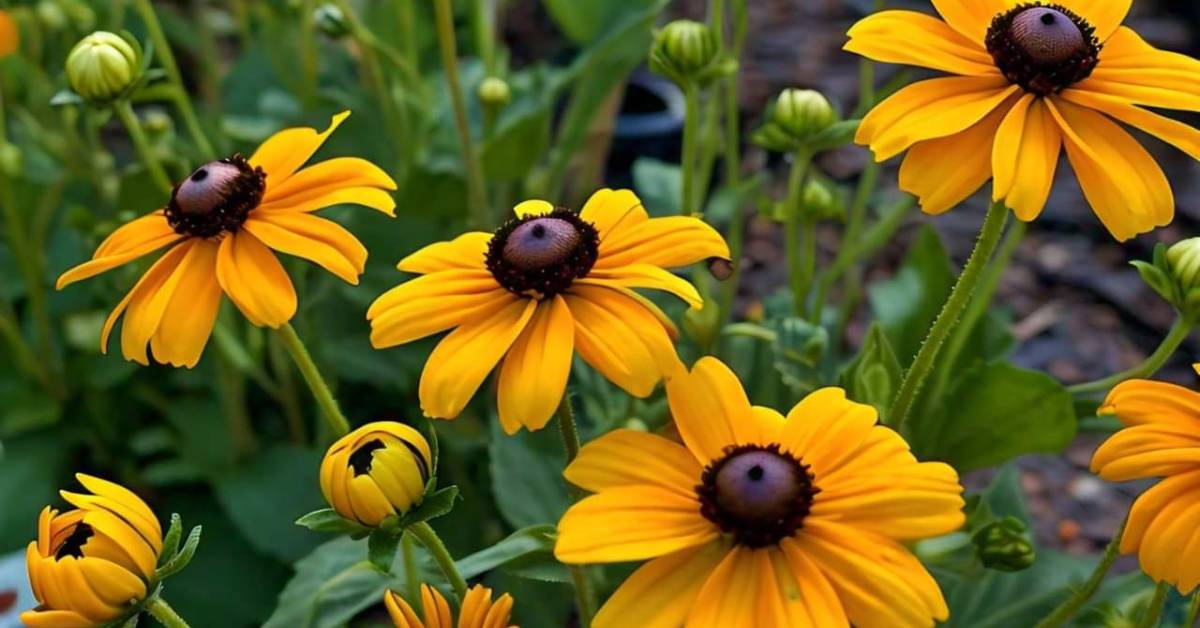
This plant, sometimes known as the brown eyed susan plant, may generally reach a height of two to five feet and a spread of approximately one to three feet. The daisy-like flowers that are relatively modest and measure between one and two inches in diameter are the distinguishing feature of this plant. This “brown-eyed” appearance is attributed to the fact that each blossom has bright yellow petals that surround a noticeable dark brown or black core.
The brown eyed susan plant flowers are another thing that makes it stand out. The species name, triloba, comes from the fact that most of them have three lobes. They are also covered in fine hairs that give them a slightly rough feel. There are different sizes of green leaves. The lower leaves are bigger and have more lobes, while the top leaves are smaller and have a more lance-shaped shape.
2. Differences Between Brown Eyed Susan and Black Eyed Susan
The brown eyed susan plant is different from the black-eyed susan because it has smaller flowers and grows in a more spread way. Both plants are in the Rudbeckia genus. The black eyed susan doesn’t have the three-lobed leaves that are typical of the brown eyed susan plant. Instead, its flowers are usually bigger and its petals are wider and rounder.
3. Native Habitat and Geographical Distribution
The brown eyed susan plant is native to the central and eastern United States. It is able to flourish in a wide range of environments, such as prairies, open forests, and along roadsides. The USDA hardiness zones 4 to 8 are where it is most usually found, and it can be found growing in both wild and cultivated environments.
This plant can grow in a lot of different situations, which makes it a strong addition to any garden. It grows best in wildflower fields and naturalized areas, where it can spread and make a sea of golden flowers.
Growing Conditions
Before you try to grow the brown eyed susan plant, you should know what conditions it does best in. This plant doesn’t need much care, but it will grow and bloom best if it is in the right setting.
1. Ideal Growing Zones
When grown in USDA hardiness zones 4 to 8, the brown eyed susan plant is able to flourish. Because it can handle both cold and hot weather in these areas, it is a good choice for a lot of different temperatures. People who live outside of these zones might still be able to grow the plant, but they might have to do more to keep it safe from very cold or very hot weather.
2. Soil Requirements
The brown eyed Susan plant does best in sandy or loamy soil that drains well. As long as the soil is not saturated with water, it is able to thrive in quite a few different kinds of soil, including clay. Root rot and other problems caused by too much water must be avoided by making sure there is good drainage.
The ideal pH range for the plant is between 6.0 to 7.5, and it thrives in soil that is slightly acidic to neutral in that range. It might be helpful to check the pH of the soil before planting and make changes if needed. Adding organic waste, like compost, can make the soil more fertile and improve its structure. This gives plants the nutrients they need to grow in a healthy way.
3. Sunlight Needs
The brown eyed susan plant does best in full sun because it likes being in the sun. It needs to get at least 6 to 8 hours of strong sunlight every day. It can handle some shade, but too much shade may make it bloom less and grow more slowly.
In regions with higher average temperatures, a little afternoon shadow might be helpful in shielding the plant from the severe heat; but, in general, full sun is preferable to achieve the most amount of blooming.
4. Watering Requirements
One thing that people like about the brown eyed susan plant is that it can survive in dry conditions. Once it’s established, it only needs light watering, which makes it a great choice for areas that don’t get much rain or people who are trying to save water.
On the other hand, it is essential to water the plant on a consistent basis throughout the first year after planting it in order to assist in the development of a robust root system. It is best to water the plant deeply because this encourages the roots to develop downward, which in turn increases the plant’s resistance to drought.
During long droughts, giving the plant deep watering every once in a while will help keep it healthy and happy.
5. Climate Adaptability
The brown eyed susan plant does well in a lot of different settings. It can survive cold winters, which makes it a good choice for farmers in the north. It can also survive in warmer, drier areas because it can handle both heat and drought.
The plant can do well in both wild and developed areas, showing how adaptable it is. The brown eyed susan plant is a strong and reliable choice, whether it’s in a well-kept garden or an area that has grown wild.
Planting Brown Eyed Susan
You need to know the right way to plant in order to be successful, whether you are starting with brown eyed susan seeds or the plant itself. The steps in this part will show you how to plant and care for this lovely plant in your garden.
1. Planting the Brown Eyed Susan Plant
1.1 Best Planting Times
The brown eyed susan plant grows best in the spring or early fall. When you plant in the fall, you give the plant a head start for the next growing season. When you plant in the spring, the plant has time to get established before the heat of summer.
In places where winters are mild, planting in the fall is often best because the plant has time to grow strong roots before the ground freezes.
1.2 Step-by-Step Planting Guide
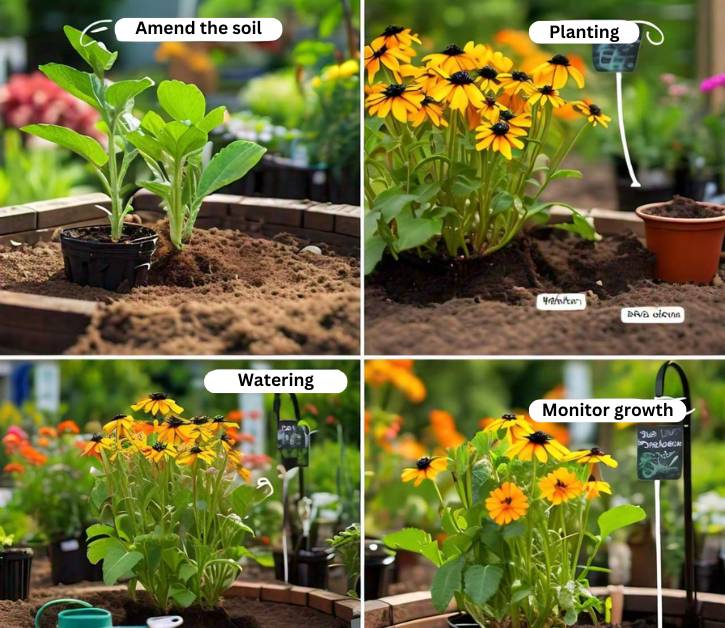
- Prepare the Planting Site: Determine a location that is sunny and has soil that drains well. Weeds and debris should be removed from the area, and the soil should be worked to a depth of around 12 inches.
- Amend the Soil: If the dirt is heavy or clay-like, you might want to add sand or compost to help it drain better. Adding organic matter to sandy soils can help them hold on to water.
- Dig the Planting Hole: The root ball of the brown eyed susan plant should be inserted into a hole that is twice as wide and exactly the same depth as the hole. By doing so, the roots are able to spread more freely.
- Plant the Brown Eyed Susan: After placing the plant in the hole, check to see that the top of the root ball is at the same level as the soil that is surrounding it. After filling the hole with soil, gently press down on it to remove any air pockets that may have formed.
- Water Thoroughly: Once you’re done the planting process, it is important to properly water the area in order to enable the soil to settle and to establish contact between the roots and the soil.
- Mulch the Area: The application of a layer of mulch around the base of the plant helps to regulate the temperature of the soil, prevent the growth of weeds, and conserve moisture.
- Monitor Growth: For the next few weeks,keep an eye out for any indications of stress or dryness on the plant, and water it as required to ensure that it is properly established.
2. Planting Brown Eyed Susan Seeds
When it comes to cultivating this plant, planting brown eyed susan seeds is a method that is both cost-effective and rewarding. This is especially true if you want to fill a large area with wildflowers.
2.1 Seed Selection and Sources
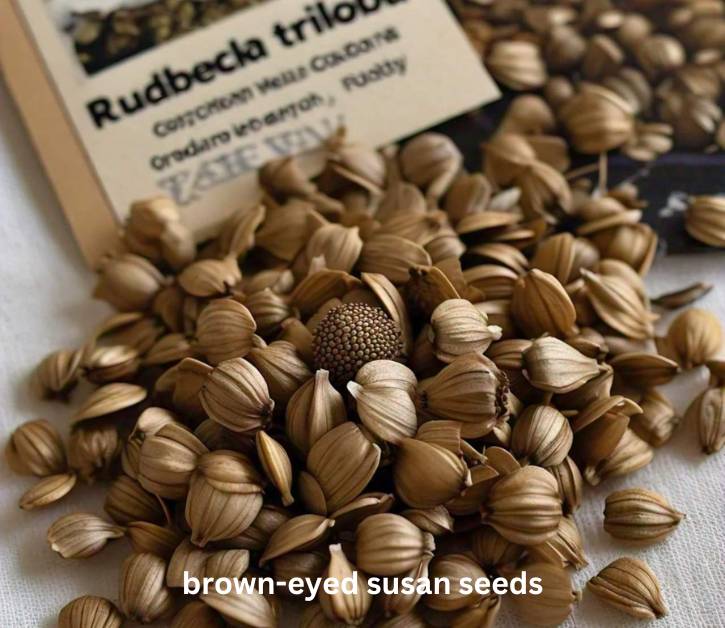
It’s important to get brown eyed susan seeds from a trusted source and make sure the seeds are of good quality. To make sure you get the right type, look for seeds that say Rudbeckia triloba on the label.
You can buy seeds from native plant sales, online nurseries, or garden stores. If you want to collect your own seeds, make sure to pick plants that are healthy and fully grown.
2.2 Stratification Process for Better Germination
One method that is beneficial to brown eyed susan seeds is a procedure known as stratification. This method replicates the natural winter conditions that the seeds would encounter if they were grown in the wild. The process of stratification helps break the dormancy of the seed, which ultimately results in increased germination rates.
To stratify the seeds, follow these steps:
- Mix the Seeds with Moist Sand: Mix together the leftover brown eyed susan seeds with an equal amount of vermiculite or sand that has been moisture absorbed. During the process of stratification, this combination will assist in maintaining an even level of moisture in the seeds.
- Seal the Mixture in a Bag: Place the seed and sand mixture into a plastic bag that can be sealed back up again. Please provide the date and the type of seeds on the label of the bag.
- Refrigerate the Seeds: The bag should be stored in the refrigerator, not the freezer, for a period of 30 to 90 days. The seeds will be ready for germination if they are exposed to temperatures that are cold enough during this time period to replicate winter conditions.
- Check Moisture Levels: Make sure to check the moisture levels in the bag on a regular basis. You want the sand to be slightly damp, but not completely drenched. In the event that it becomes dry, lightly spritz it with water.
- Sow the Seeds: Once the stratification time is over, the seeds are ready to be planted. In order to achieve the best results from this method, it is recommended that you plant the seeds immediately outside during the fall or early spring.
3. Direct Sowing vs. Indoor Seed Starting
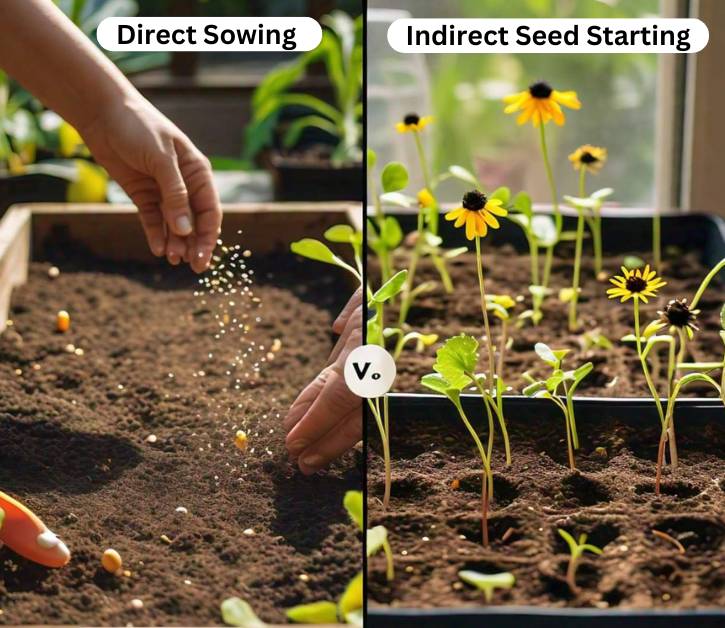
For brown eyed susan seeds, you have the option of starting them either indoors or immediately in the garden, depending on the temperature and your own preferences.
3.1 Direct Sowing
- Timing: It is best to plant the seeds outside at the beginning of spring, after the last frost, or in the late fall, before the ground freezes.
- Site Preparation: The planting location should be prepared by removing any weeds and getting the soil as loose as possible to a depth of a few inches.
- Seed Spacing: Spread the seeds out thinly on top of the soil, and then lightly press them into the ground. The seeds need light to grow, so there’s no need to cover them with soil.
- Watering: To ensure that the soil remains moist until the seeds germinate, the area should be watered lightly. Depending on the circumstances, this could take anywhere from 7 to 30 days to complete.
- Thinning: Once the seedlings have reached a height of a few inches, they should be thinned out to ensure that they are properly spaced, often between 12 to 18 inches apart.
3.2 Indoor Seed Starting
- Timing: Start the seeds indoors between six and eight weeks before the date that is projected to be the last frost in your region.
- Containers and Soil: Fill seed boxes or small pots with a light seed-starting mix that drains well.
- Planting Depth: Place the seeds in a scattering pattern on the surface of the soil and gently push them into the mixture without covering them.
- Lighting: Put the trays in a sunny window or under grow lights. In order to germinate, the seeds require light.
- Watering: Maintain a moist soil so that it does not become waterlogged. If required, mist the surface in order to prevent the seeds from being displaced.
- Transplanting: The seedlings should be hardened off by progressively exposing them to outdoor environments before being transplanted into the garden. This should be done once the seedlings have established a few sets of genuine leaves and the conditions outside are favorable.
4. Optimal Planting Depth and Spacing
Remember that brown eyed susan seeds need light to grow when you put them. On top of the dirt or just below the surface with a thin layer of soil is the best way to plant them. There should be about 12 to 18 inches of space between the seeds so that the plants can grow without being crowded.
If you want to plant seeds or young plants, make a hole big enough for the root ball and set the plant at the same depth it was growing at in its pot. Airflow is essential for the prevention of fungal illnesses, and proper spacing is essential for airflow.
5. Germination Time
The amount of time it takes for brown eyed susan seeds to germinate might change depending on the conditions of the surrounding environment. In most cases, the time it takes for seeds to germinate ranges from 7 to 30 days. Increasing the temperature and maintaining a steady level of moisture will hasten the process of germination.
Patience is essential, as the germination of certain seeds may take extra time. Maintaining the soil’s moisture and continuing to keep an eye out for seedlings is necessary if you do not observe germination within a few weeks.
Care and Maintenance
As soon as your brown eyed susan plant has become established, it will require very little maintenance in order to flourish. On the other hand, if you perform a few routine care tasks, you can make certain that your plants will continue to be in good health and will continue to produce an abundance of flowers year after year.
1. Regular Care Tips for the Brown Eyed Susan Plant
1.1 Mulching Practices
Putting mulch around the base of the brown eyed susan plant helps keep the soil moisture, suppress weeds, and keeps the soil at the right temperature. Put down a 2 to 3 inch layer of soil, shredded bark, or other organic mulch around the plants. Do not put the mulch up against the stems, as this can cause them to rot.
2. Pruning and Deadheading
The brown eyed susan plant will produce more flowers during the growing season if you remove the old flowers, which is also known as “deadheading.” To deadhead, just cut off the dying flowers just above the leaves or flower buds that are closest to them.
Pruning can also help the plant keep its size and shape. Just before winter, when the flowers are gone, cut the stems back to about 6 inches above the ground. Not only does this clean up the garden, it also helps the plant store energy for the next growing season.
2.1 Fertilization Practices
When it comes to feeding, the brown eyed susan plant doesn’t have any special needs. Putting down a balanced, slow-release fertilizer in the early spring is usually enough to encourage healthy growth. If your soil isn’t very good, you may want to feed the plants again in the middle of the season. But be careful not to give them too much fertilizer, because that can cause leaves to grow faster than flowers.
2.2 Watering
Once it’s established, the brown eyed susan plant can handle drought, but it will do best if you water it regularly, especially during long dry times. Deeply water the plants every so often, but don’t water them too often. Let the soil dry out a bit between waterings. This makes the roots grow deeper, which helps the plant survive dry times.
3. Common Pests and Diseases
Although the brown eyed susan plant is generally resistant to a wide variety of common garden pests and diseases, it is possible for it to be impacted by problems such as the following on occasion:
- Aphids: Insecticide soap or the introduction of natural predators such as ladybugs are two methods that can be utilized to control these little insects that feed on sap sources.
- Spider Mites: A stippling effect can be caused on leaves by these little pests. The best way to get rid of them is to raise the humidity level around the plants and then use a powerful stream of water to move them around.
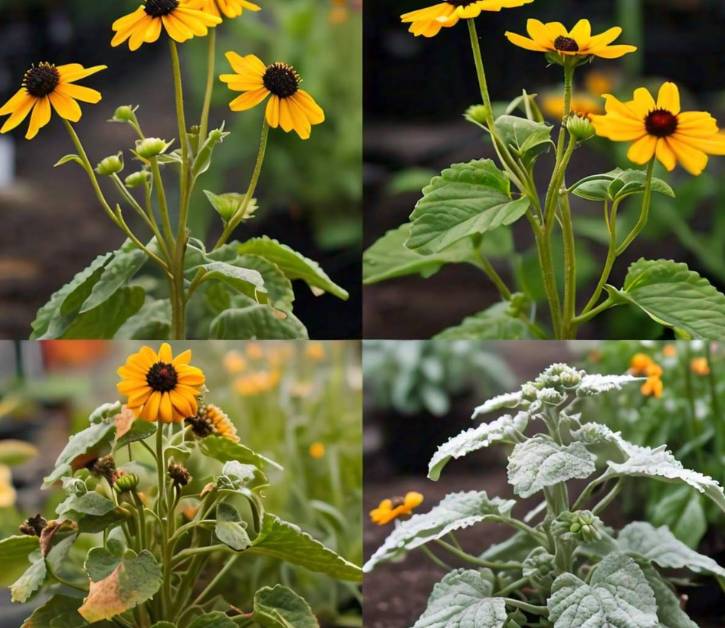
- Powdery Mildew: Symptoms of this fungal illness include a white powdery covering that is found on the leaves. Ensure that there is adequate air circulation, refrain from watering from above, and use fungicides if they are required.
- Rust: Rust can make spots on the leaves that are orange or brown. To stop it from spreading, get rid of and destroy any leaves that are affected and make sure there is good air flow.
4. Companion Planting Ideas
Companion planting means growing different plants next to each other to help them grow, keep pests away, and make the yard healthier overall. The brown eyed susan plant goes well with native and permanent plants like
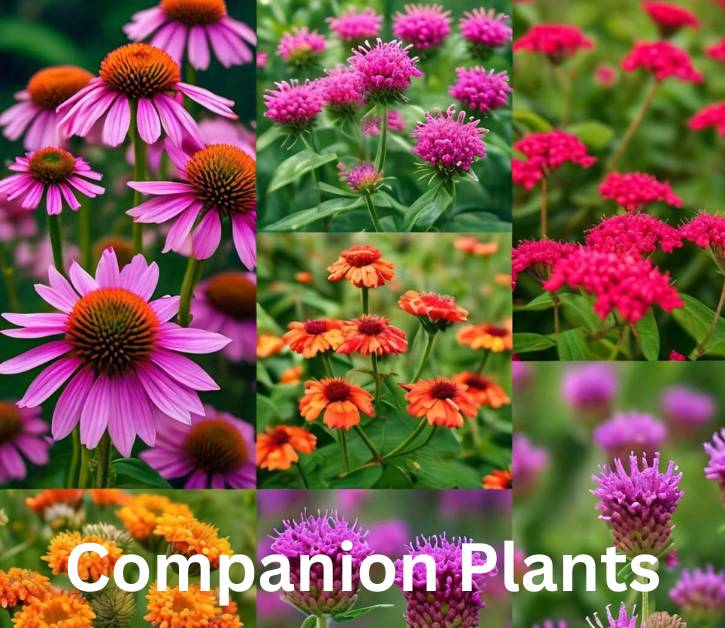
Coneflowers (Echinacea): Both plants are ideal companions since they grow in conditions that are comparable to one another and bloom at the same time.
Bee Balm (Monarda): The same growth circumstances that are beneficial to the “brown eyed susan” are also beneficial to this plant, which attracts pollinators.
Butterfly Weed (Asclepias tuberosa): Both plants are native to similar areas, and when grown together, they make a beautiful garden that is good for pollinators.
Purple Prairie Clover (Dalea purpurea): In addition to enhancing the health of the soil, this nitrogen-fixing plant provides a wonderful compliment to the yellow flowers of the “brown eyed susan.
5. Overwintering the Plant
The brown eyed susan plant may need a little extra care in colder places to make sure it makes it through the winter:
- Cutting Back: Cut the stems back to about 6 inches above the ground after the first frost. This makes the plant use less power.
- Mulching: To prevent the roots of the plant from being damaged by cold temperatures, a thick layer of mulch should be applied around the base of the plant.
- Leave Seed Heads: Leave some seed heads on the plants so that birds can eat them over the winter and the plants can set seeds on their own.
Harvesting and Collecting Seeds
When it comes to cultivating the brown eyed susan plant, gathering and collecting seeds is one of the most satisfying portions of the process. You are able to reproduce more plants or share them with other gardeners as a result of this development.
1. Harvesting Brown Eyed Susan Seeds
1.1 Timing for Seed Collection
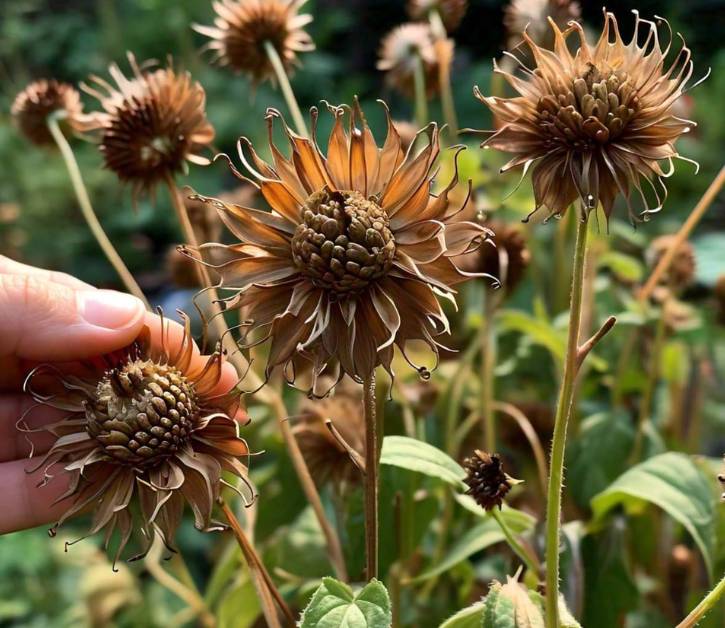
The best time to harvest brown eyed susan seeds is between the end of summer and the beginning of fall, after the blooms have died down and the seed heads have become brown. If you give the seeds a light tug and they readily come away from the seed head, then they are ready to be planted.
1.2 Methods for Harvesting Seeds
- Cut the Seed Heads: To remove the seed heads from the plant, you should make use of pruning shears, ensuring that you leave a few inches of stem connected.
- Dry the Seed Heads: Arrange the seed heads in a paper bag or on a screen and place them in an area that is warm, dry, and has adequate ventilation. About a week should be enough time for them to totally dry out.
- Extract the Seeds: To extract the seeds from the seed heads, gently crush them once they have dried. It is possible to separate the seeds from the chaff by passing them through a sieve with a tiny screen or by blowing lightly on them in order to rid them of the debris.
- Cleaning the Seeds: In order to clean the seeds, remove any chaff or plant material that may still be there. During storage, this helps prevent mold from growing.
2. Storing Brown Eyed Susan Seeds
2.1 Proper Drying Techniques
Before putting the seeds away, make sure they are completely dry. Any remaining water can cause mold to grow and make seeds less likely to grow. For a few days, spread the seeds out on a paper towel or screen and keep them somewhere warm and dry.
2.2 Storage Conditions for Longevity
Keep the seeds somewhere cool and dry, like in the fridge in a jar with a lid. Put a small packet of silica gel in the jar to soak up any water that is still there. If you store brown eyed susan seeds properly, they can stay alive for several years. This way, you can be sure you’ll always have seeds for planting.
2.3 Labeling and Organization
Labeling your seed storage containers with the date of harvest as well as the type of seeds you are storing is a crucial requirement. Your ability to keep track of the age of your seeds and guarantee that you are using the most recent seeds throughout each planting season will be facilitated by this practise. If you organize your seeds according to the type of seed and the planting season, it will be much simpler for you to design your garden.
2.4 Sowing Harvested Seeds
The brown eyed susan seeds that you have obtained should be planted in the same manner as described in the section on planting, so make sure to follow those procedures to the letter. Providing that the seeds have been properly preserved, they should germinate in the same manner as seeds that have been acquired from a commercial source.
If you want to make a naturalized area or wildflower meadow, you can spread the seeds in the fall so that they can go through natural stratification over the winter. This will help them germinate strongly in the spring.
Benefits of Growing Brown Eyed Susan
Despite its attractive appearance, the brown eyed susan plant provides a variety of advantages to its users. This multipurpose plant is an excellent addition to any garden since it brings in pollinators and helps to maintain the ecosystems in the surrounding area.
1. Pollinator Attraction
The plant known as the brown eyed susan plant attracts a wide variety of pollinators, including birds, butterflies, and bees. The bright yellow flowers and dark cores of this plant are extremely appealing to a wide range of insects, notably native bees, which are an essential component in the process of pollinating other plants in your garden with their pollen.
Brown-eyed susans are frequently visited by butterflies, especially the monarch, which consume the nectar offered by the plant and contribute to the pollination of other plants. Furthermore, birds, particularly finches, are drawn to the seeds, which makes this plant an excellent option for gardens that are well-suited to the presence of animals.
2. Erosion Control
Because of its extensive and fibrous root system, the brown eyed susan plant is a suitable option for the control of erosion. When these plants are planted on slopes or in regions that are prone to erosion, they help to stabilize the soil and prevent it from being washed away by strong rains.
3. Low Maintenance and Drought Tolerance
The brown eyed susan plant is very easy to take care of once it’s established. Because it can handle dry, it’s perfect for xeriscaping, also known as “water-wise gardening,” which tries to save water. Because of its toughness, the plant can also do well in places that aren’t ideal, like those with bad soil or spots where it rains all the time.
4. Native Plant Benefits
The brown eyed susan is a native plant to much of the central and eastern United States. It is an important part of many ecosystems there. Native plants do well in the temperature and soil where they grow, so they often need less water and fertilizer. They also give local animals important places to live and food to eat.
It is possible for gardeners to contribute to the preservation of local biodiversity, provide support for pollinator populations, and create a garden environment that is more sustainable if they choose to grow brown eyed susans.
5. Aesthetic Appeal
The brown eyed susan plant is famous for how beautiful it looks. Its dark centers and bright yellow petals make a striking contrast that adds bright color to borders, gardens, and wildflower fields. The plant blooms for a long time, from mid-summer to early fall. This means that your garden will stay lively and bright for a few months.
6. Versatility in Garden Design
The brown eyed susan plant can be used in a lot of different garden plans, from a cottage garden to a formal border to a naturalized meadow. It grows tall and straight, which makes it a great choice for the middle or back of borders. Because it attracts bees, it’s also a great addition to pollinator gardens.
Troubleshooting Common Issues
Gardeners may occasionally experience problems with the brown eyed susan plant due to pests, diseases, or environmental variables, despite the fact that the plant is normally not difficult to care for and does not cause any problems. The following is a list of typical issues and their solutions:
1. Wilting or Yellowing Leaves
Causes:
- Overwatering or poor drainage
- Root rot due to waterlogged soil
- Nutrient deficiencies
Solutions:
- Check that the plant is growing in soil that has good drainage. In the event that it is required, improve drainage by incorporating sand or compost into the soil.
- You should only water the plant when the top inch of soil is completely dry. Take care not to overwater.
- If a nutrient deficiency is found in the soil, it should be amended with the proper fertilizer and the soil should be tested for nutrient levels.
2. Poor Bloom Production
Causes:
- Insufficient sunlight
- Over-fertilization with nitrogen
- Lack of deadheading
Solutions:
- You should make sure that the plant is exposed to direct sunshine for a minimum of six to eight hours per day.
- Do not use too many high-nitrogen fertilizers, as they can make leaves grow faster than flowers.
- To ensure that flowers continue to bloom, it is important to deadhead them on a regular basis.
3. Pest Infestation
Causes:
- Aphids, spider mites, or other common garden pests
Solutions:
- In order to reduce the number of aphids, it is recommended to introduce beneficial insects like ladybugs.
- For the treatment of infestations, you can use insecticidal soap or neem oil.
- It is important to ensure that there is adequate space between plants in order to enhance air circulation and limit the chance of pest problems.
4. Powdery Mildew
Causes:
- High humidity and poor air circulation
- Overhead watering
Solutions:
- By correctly spacing plants and trimming to minimize overcrowding, you may improve air circulation in your container garden.
- If you want to prevent wetting the foliage, water the plant near the base of the plant.
- If necessary, apply a fungicide in order to bring severe outbreaks under control.
5. Self-Seeding Concerns
Causes:
- There are a lot of brown eyed susan plants that can grow quickly.
Solutions:
- If you don’t want the flowers to spread, cut off the stems before the seeds form.
- Remove plants that grow in places you don want them to if you want to control growth.
Conclusion
Any garden would benefit from the inclusion of the brown eyed susan plant (Rudbeckia triloba), which is a plant that is not only low-maintenance but also visually pleasing. Whether you plant it for its bright flowers, its ability to bring in pollinators, or the fact that it can survive in dry conditions, this plant will add color and life to your outdoor areas.
You can grow and take care of brown eyed susan plants, pick and store brown eyed susan seeds, and even fix common problems that may come up if you follow the tips in this guide. Growing this native perennial has many benefits, such as helping local ecosystems and having a yard full of happy yellow flowers.
If you give your brown eyed susan plants the care they need, they will grow well and give you years of beauty and environmental benefits. Whether you’re a seasoned farmer or just starting out, the brown eyed susan is a great choice because it’s easy to take care of and looks beautiful.
Read Article


Pingback: Croton Mammy Plant Care - Seasonal Tips for Success