The croton mammy plant (Codiaeum variegatum), which is also called the mammy croton plant, is a popular houseplant loved for its brightly coloured leaves. It looks beautiful in any room or tropical garden because its leaves are leathery and twisty. The leaves come in different colours, like red, yellow, orange, green, and purple. This complete guide will teach you everything you need to know about croton mammy plant care, from how to understand its growth needs to fixing common issues, so your plant does well whether it’s in your garden or inside.
Introduction to Croton Mammy Plant
A variety of the croton plant family, the croton mammy plant is famous for its beautiful, multicoloured leaves. This plant comes from tropical Southeast Asia and the islands in the Pacific. It has spread to homes and parks all over the world because it looks beautiful and is easy to take care of.
- Scientific Name: Codiaeum variegatum
- Common Names: Croton Mammy, Mammy Croton
- Family: Euphorbiaceae
- Origin: Southeast Asia, Pacific Islands
People love the croton mammy plant for its pretty looks. It’s often used to add a splash of colour to both indoor and outdoor areas. This guide will talk about the best ways to grow this plant, how to make more plants, and how to deal with common problems.
Understanding Croton Mammy Plant
1. Description and Characteristics
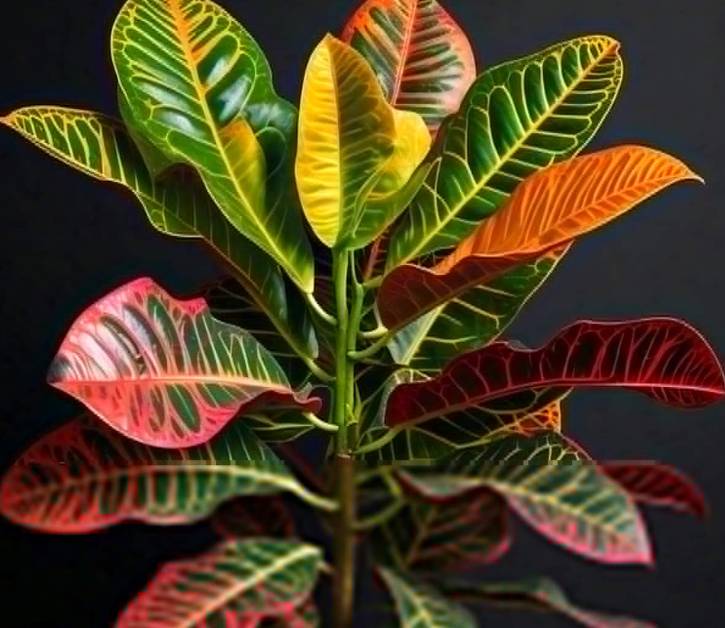
The croton mammy plant is easy to spot because its leaves are narrow and bent. The colours of its leaves can range from dark green to bright red, orange, yellow, and even purple. The leaves can get up to 8 inches long and feel like leather. The mammy croton stands out from other flowers because of its unique leaves.
1.1 Size and Growth Habit
- Mature Height: Typically 3-4 feet tall
- Growth Rate: Moderate
- Leaf Shape: Narrow, twisted, and leathery
The mammy croton plant is smaller than other types of croton, which makes it a great choice for indoor gardening, planting in containers, and adding colour to tropical settings.
2. Botanical Background
In addition to being a member of the Euphorbiaceae family, the croton mammy plant is linked to other well-known houseplants, such as the poinsettia and the rubber plant. It does best in warm places, where it can become a small bush. But if you take the right steps, you can grow it indoors in a number of areas.
2.1 Common Names
- Mammy Croton
- Mammy Plant
2.2 Botanical Significance
- Popular in both indoor and outdoor landscaping
- Valued for its vibrant, multicolored foliage
2.3 Important Figures and Facts
- Optimal temperature: 60-85°F
- Light requirements: Bright, indirect sunlight
- Soil pH: Slightly acidic, well-draining
- Mature size: 3-4 feet in height
- Common pests: Spider mites, mealybugs, scale insects
- Propagation success rate using stem cuttings
- Humidity requirement: High, ideally above 50%
- Fertilization frequency: Monthly during growing season
Optimal Growing Conditions for Croton Mammy Plant
1. Light Requirements
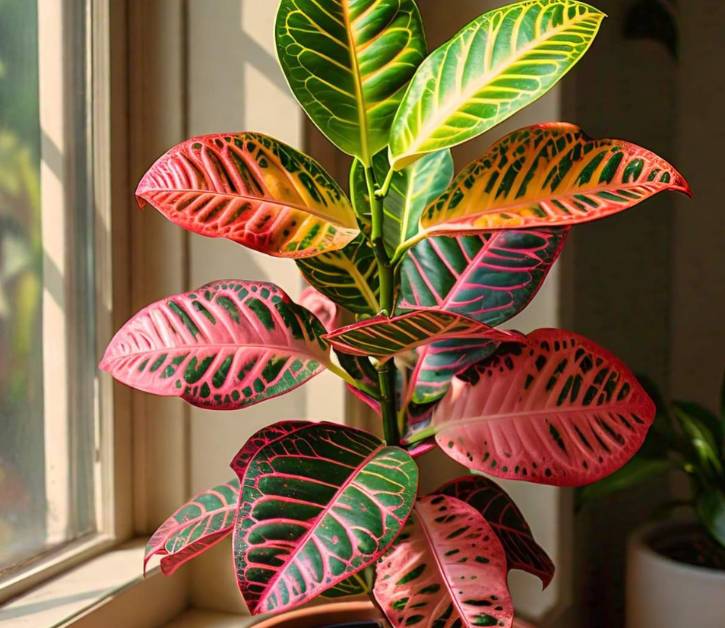
It is essential to provide the croton mammy plant with strong, indirect light in order to ensure that its leaves continues to retain its vibrant colour. It can handle some strong sunlight, especially in the morning, but its leaves can get burned if they are in the sun all day.
1.1 Best Light Conditions
- Bright, indirect sunlight
- Morning sun exposure is beneficial
- Avoid direct afternoon sunlight to prevent leaf burn
If you want to grow your croton mammy plant indoors, put it near a window that faces east or west so it can get lots of light. If there isn’t enough light, the plant’s colours may fade and its growth may slow down.
1.2 Effects of Inadequate Lighting
- Dull, less vibrant foliage
- Slower growth
- Potential leaf drop
If you see these signs, you might want to move your plant to a brighter spot or add fake grow lights to help it.
2. Temperature and Humidity
The croton mammy plant is a real tropical beauty that does best in warm, damp places. In order to maintain the health of your plant, it is essential to create an environment that is as similar as possible to its natural habitat.
2.1 Ideal Temperature Range
- 60-85°F (15-29°C)
2.2 Humidity Requirements
- Prefers high humidity (above 50%)
- Benefits from regular misting or the use of a humidifier
The plant can be stressed by variations in temperature, particularly cold drafts or sudden reductions below 60 degrees Fahrenheit, which can result in the loss of colour and the dropping of leaves. Along the same lines, if the air is very dry, the plant could have leaf edges that are dry and crispy.
2.3 Humidity Solutions
- Utilise a humidifier in order to keep the high humidity levels indoors.
- When you group plants together, you might create a microclimate that is more humid.
- The plant should be placed on a pebble tray that is filled with water in order to raise the relative humidity.
When grown outside, the croton mammy plant does best in warm, wet conditions. If you live somewhere with cooler weather, you might want to grow it in a pot so you can bring it inside when it gets cold.
3. Soil and Potting Requirements
When it comes to the health of your croton mammy plant, having the right soil and potting are really necessary. This plant thrives in soil that is well-drained and also retains some moisture, but does not become waterlogged because of this.
3.1 Preferred Soil Type
- Well-draining potting mix
- Slightly acidic to neutral pH (5.5 to 7.0)
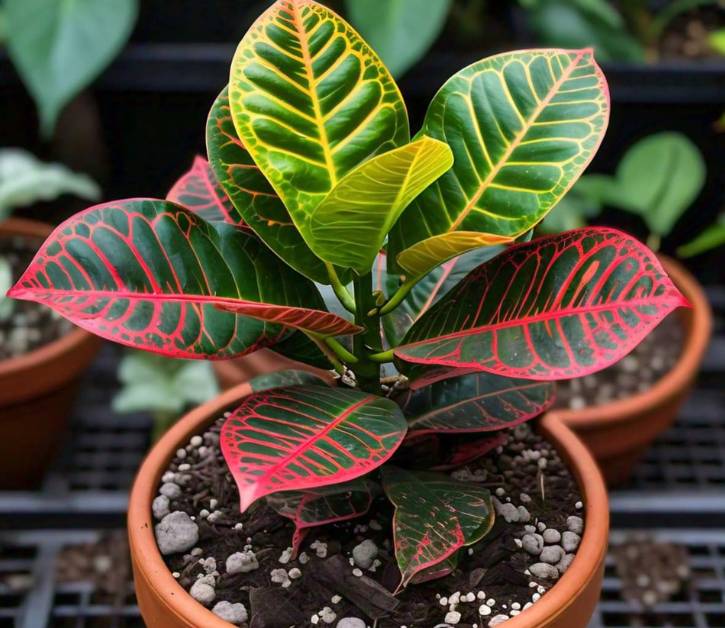
The mammy croton plant can benefit from a potting mix that consists of peat, pine bark, and either coarse sand or perlite. This combination can be very effective. In addition to ensuring that the plant’s roots receive sufficient moisture, this mixture also guarantees that drainage is adequate.
3.2 Potting Tips
- If you want to avoid waterlogging, select a container that has drainage holes.
- One option for regulating the moisture content of the soil is to use a terracotta pot.
- The soil should be repotted every two to three years in order to support the plant’s growth.
It is important to handle the plant with care while repotting it because its roots can be fragile. If you want to prevent excess soil, which can hold too much water and contribute to root rot, choose a pot that is only slightly larger than the one you are currently using but is still a good size.
Watering and Fertilization
1. Watering Guidelines
A very important part of croton mammy plant care is watering. To stay healthy, these plants need regular watering, but too much watering can cause root rot.
1.1 Watering Frequency
- When you feel that the top inch of soil is dry, water it.
- During the beginning of the growing season (spring and summer), increase the frequency.
- When the plant is in its dormant state (fall and winter), watering should be reduced.
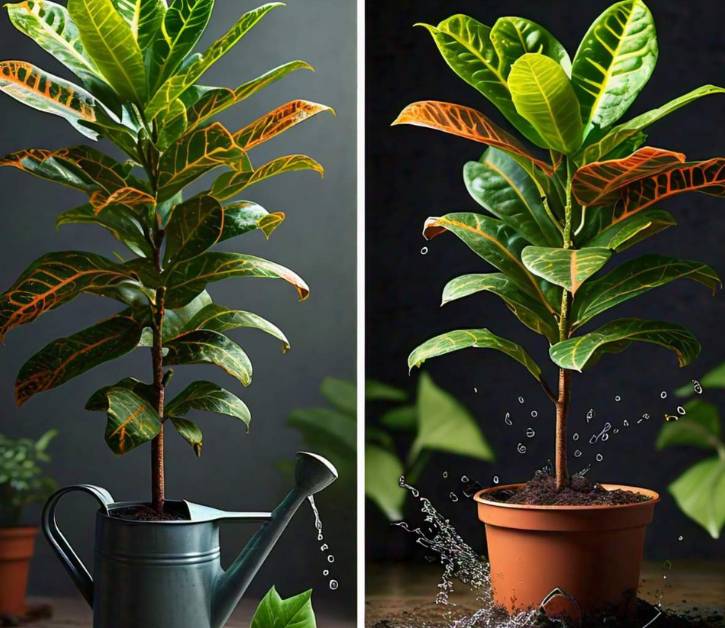
For the croton mammy plant, it’s best to water it well and let the extra water drain out of the pot. Empty the saucer so the plant doesn’t sit in water, which can damage the roots.
1.2 Signs of Overwatering
- Yellowing leaves
- Soft, mushy stems
- Root rot
1.3 Signs of Underwatering
- Drooping or wilting leaves
- Dry, crispy leaf edges
Adapt your watering schedule to the changing of the seasons and the conditions in which the plant is growing. In situations that are hotter and drier, it may be essential to water the plant more frequently. On the other hand, the plant will require less water in environments that are cooler or more humid.
2. Fertilization Practices
If you feed your croton mammy plant regularly, it will keep its bright colours and grow in a healthy way.
2.1 Recommended Fertilizer
- Use a fertilizer that is well-balanced and has a delayed release (for example, 10-10-10 or 20-20-20).
- You might also use a liquid fertilizer that has been diluted to half its original concentration.
2.2 Fertilization Schedule
- During the growing season (spring and summer), fertilize the plant on a monthly basis.
- In the fall and winter, fertilizer should be reduced to once every 6 to 8 weeks.
If you fertilize too much, salt can build up in the soil and hurt plants in other ways. If you see white crusts on the top of the soil, flush it with water to get rid of the extra salts.
2.3 Organic vs. Synthetic Fertilizers
- Organic fertilizers, like compost and worm castings, are better for the soil and work better over time.
- Synthetic fertilizers add nutrients quickly, but for long-term soil health, they may need to be mixed with organic matter.
Pruning and Maintenance
1. Pruning Techniques
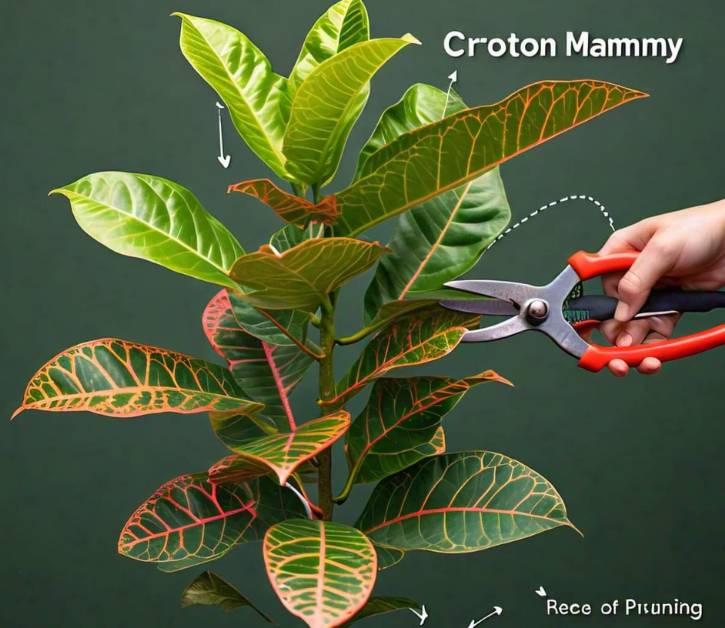
By doing regular pruning, you may help your croton mammy plant keep its shape and size, as well as foster growth that is fuller and bushier.
1.1 When to Prune
- The best time to do it is in the spring or summer.
- Perform modest pruning during the growing season in order to remove any leaves that are damaged or dead.
1.2 How to Prune
- Employ pruning shears or scissors that are spotless and sharp.
- Get rid of any leaves that are yellowing, damaged, or dead.
- Reduce the length of lanky stems in order to promote branching.
Additionally, pruning is an effective method for controlling the size of the plant, particularly when it is being grown indoors or in a container. You may encourage new development and maintain the appearance of your croton mammy plant by removing older leaves and stems. This will help the plant look rich and lively.
2. Cleaning and Grooming
It’s good for the health and look of your croton mammy plant to keep the leaves clean. Soil and dust can keep sunshine from reaching the leaves, which makes it harder for the plant to make food.
2.1 Cleaning Tips
- To eliminate dust from the leaves, use a moist towel to wipe them down.
- Avoid using commercial leaf shine products because they have the potential to clog the pores of the leaf.
- Make sure to check the plant on a regular basis for any signs of illness or pests.
When you clean your plant on a regular basis, you also have the opportunity to look for early signs of illness or pests, which helps to ensure that your plant continues to be healthy and vibrant.
Propagation Methods
1. Stem Cuttings
The croton mammy plant can be propagated using stem cuttings, which is one of the most straightforward methods. It is possible to grow new plants using this strategy by using the stems of the parent plant that are in good health.
Step-by-Step Guide:
- Select a Healthy Stem: Select a stem that is in good condition, does not produce flowers, and has at least 3 to 5 leaves. The length of the stem should be between 4 to 6 inches, and it should be free of any diseases or pests.
- Make the Cut: Cut the stem just below a node with clean, sharp scissors or pruning shears. A node is the place where the leaves connect to the stem. To give the roots more room to grow, the cut should be at a 45-degree angle.
- Prepare the Cutting: After removing the lower leaves from the stem, leave 2 to 3 leaves at the top of the plant. This results in less water being lost and directs the plant’s energy towards the development of its roots.
- Apply Rooting Hormone: Rooting hormone powder should be applied to the cut end of the stem in order to stimulate the growth of roots more quickly. This step is not required, but it has the potential to improve the success rate.
- Plant the Cutting: To plant the stem, place the cut end of the stem into a tiny pot that is filled with potting mix that has good drainage (a mixture of peat and perlite works well). For the cutting to remain erect, soil should be compacted around it.
- Water and Cover: To make a wet environment, cover the pot with a plastic bag or put the cutting in a propagator and water it well. This helps keep the water in and helps the roots grow.
- Place in a Warm, Bright Location: The cutting should be placed in a warm location that receives indirect sunshine. Steer clear of direct sunshine, since it has the potential to sear the tender cutting.
- Monitor and Maintain: Make sure the soil is somewhat damp but not drenched with water. After 4 to 6 weeks, using a light tug on the stem, check for the presence of roots. The presence of resistance indicates the formation of roots.
- Transplanting: It is possible to transfer the cutting onto a larger pot with ordinary potting mix once the roots have been established in the cutting.
Propagation using stem cuttings is a dependable way for growing new croton mammy plants. If you provide your new plant with the appropriate care, it will flourish and exhibit the same brilliant colors as the original plant.
2. Air Layering
Another method of propagation that is particularly useful for croton mammy plants is the air layering technique. By allowing the stem to establish roots while it is still linked to the parent plant, this method has the potential to result in a better success rate in comparison to other procedures.
Step-by-Step Guide:
- Select a Healthy Stem: You should select a stem that is fully developed, in good condition, and devoid of any diseases or pests.
- Make a Cut: Make a small cut up through the stem about a third of the way through, 12 to 18 inches from the tip of the stem. Watch out not to cut all the way through.
- Insert a Toothpick: Place a small toothpick into the cut to maintain the openness of the wound. It is because of this that the wound is prevented from healing and the production of roots is encouraged.
- Apply Rooting Hormone: Rooting hormone should be applied to the cut region in order to encourage the formation of roots.
- Wrap with Moss: Take a handful of sphagnum moss and wet it, then wrap it around the region that has been sliced. With the help of plastic wrap or aluminum foil, you can keep the moss in place while ensuring that it remains damp but not fully saturated.
- Wait for Rooting: Over the course of the following several weeks, roots will start to develop inside of the moss organism. Keep an eye on the moss on a regular basis to make sure it stays hydrated.
- Separate the New Plant: It is recommended that you cut the stem just below the root mass and carefully remove the plastic wrap or foil once a healthy root system has established, which typically occurs around six to eight weeks.
- Pot the New Plant: The newly rooted stem should be planted in a container that contains potting soil that drains effectively. Perform a thorough watering, and then position it in a warm and bright spot.
Air layering is very helpful for reproducing mammy croton plants, which are plants that are either too huge or too difficult to propagate using stem cuttings. Using this procedure, you will be able to produce a new plant that is self-sufficient while ensuring that the parent plant continues to be in good health.
Common Pests and Diseases
1. Pest Identification and Control
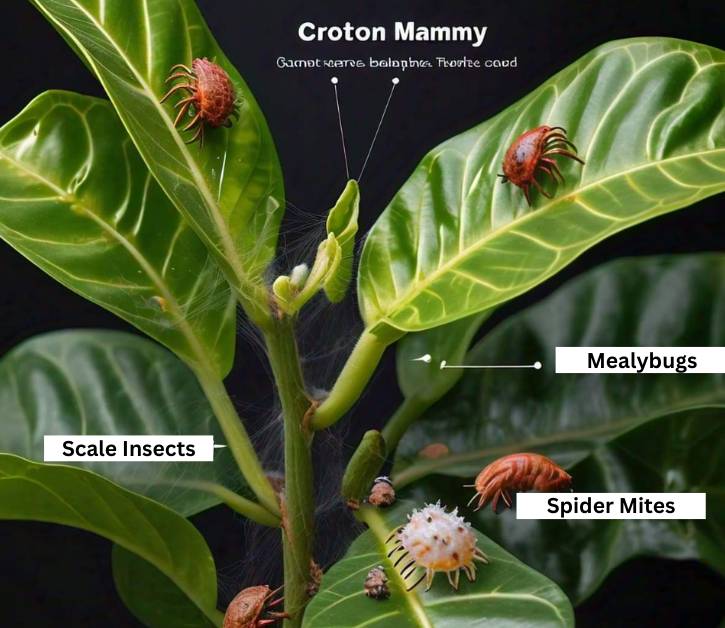
Furthermore, the croton mammy plant is sensitive to a wide range of pests, particularly when it is cultivated indoors, despite the fact that it is a tough plant. Vegetables such as spider mites, mealybugs, and scale insects are examples of common pests that, if left untreated, can cause significant damage to the plant.
1.1 Common Pests:
- Spider Mites: There are tiny insects that resemble spiders that feed on plant sap, which causes the leaves to turn yellow and fall off.
- Mealybugs: Insects that are little, white, and cottony in appearance, they congregate on the undersides of the stems and leaves of the plant and feed on the sap.
- Scale Insects: Insects with protective hard shells that attach themselves to stems and plants and frequently take the form of little brown bumps.
1.2 Signs of Infestation:
- Leaves that are yellowing or wrinkled
- sticky stuff (honeydew) on leaves and close things
- Visible insects or clusters of white fluff (mealybugs)
- Loss of leaves or slow growth
1.3 Control Methods:
- Mechanical Removal: Use a wet cloth or a cotton swab dipped in rubbing alcohol to get rid of small infestations.
- Insecticidal Soap: Spray insecticidal soap on the areas that are bugged. This soap kills soft-bodied bugs like mealybugs and spider mites.
- Neem Oil: Neem oil can be used to kill and keep away many types of pests. It is also possible for neem oil to kill fungus.
- Chemical Insecticides: If the infestation is bad, use a systemic insecticide that the plant can take and use to kill the pests that are eating it.
1.4 Preventative Measures:
- Make sure to check your plant on a regular basis for any early signs of pests.
- Spider mites like dry places, so make sure the air level is right to keep them away.
- Pests may come to your plant if it is dirty and full of dust.
2. Disease Management
Croton mammy plants often get diseases because they aren’t cared for properly, especially when they are overwatered or don’t get enough air flow. Root rot, leaf spot, and white mildew are all common diseases.
2.1 Common Diseases:
- Root Rot: Roots become mushy and leaves turn yellow when plants get too much water or bad draining.
- Leaf Spot: Leaf spots that are brown or black are caused by fungi or bacteria. They are often spread when water hits the leaves.
- Powdery Mildew: A fungus disease that causes leaves to get a white, powdery coating. This is usually caused by too much humidity and not enough air flow.
2.2 Prevention and Treatment:
- Root Rot: Make sure that the soil can drain well and don’t water it too much. If root rot is found, cut off the roots that are sick and put the plant in a new pot with dry, fresh soil.
- Leaf Spot: Take off any leaves that are damaged, and don’t water from above. Get more air moving around the plant.
- Powdery Mildew: Move more air around and lower the humidity. If you need to, use a pesticide or neem oil to treat it.
Disease is much less likely to happen if you take care of your croton mammy plant by watering, fertilizing, and trimming it properly. Check your plant often for signs of trouble, and if you find any, move quickly to fix them.
Seasonal Care Tips
1. Spring and Summer Care
Your croton mammy plant will start to grow actively when the weather gets warmer. Now is the time to water, feed, and prune to help the plant grow in a healthy way.
1.1 Watering and Fertilization:
- The frequency of watering should be increased, and it should be ensured that the soil remains constantly moist without becoming soggy.
- Use a balanced, slow-release fertilizer once a month to help plants grow strong and have bright leaves.
1.2 Pruning and Repotting:
- Lightly prune the plant to shape it and get rid of any leaves that are dead or damaged.
- In the event that your plant has outgrown its container, the springtime is the perfect time to repot it into a container that is somewhat larger.
1.3 Outdoor Placement:
- You can take your croton mammy plant outside for the summer if you live in a warm area. Put it somewhere that gets bright, indirect sunlight and shield it from the hot afternoon sun.
2. Fall and Winter Care
The croton mammy plant will slow its growth and go into a dormant phase as the weather gets cooler. To keep the plant from getting stressed out, you should change how you care for it during this time.
2.1 Watering and Fertilization:
- The frequency of watering should be reduced, and the top 2 inches of soil should be allowed to dry out in between waterings.
- Decrease the frequency of fertilization to once every six to eight weeks, or give it up entirely until spring.
2.2 Indoor Care:
- Bring your plant inside before the temperature drops below 60°F if it has been growing outside. Put it in a light spot that is away from drafts and vents that are used for heating.
- You may keep the humidity at a high level by using a humidifier or by spraying the leaves on a regular basis.
2.3 Pest Prevention:
- Spider mites and other pests may come inside during the winter. Regularly check on your plant and keep the humidity high to keep pests away.
You can make sure that your croton mammy plant stays healthy and happy all year by changing how you care for it as the seasons change.
Troubleshooting Common Problems
1. Leaf Drop
A lot of croton mammy plants lose their leaves. This is usually because of stress in the surroundings, like changes in light, temperature, or humidity.

1.1 Causes of Leaf Drop:
- Sudden Changes in Environment: Moving the plant to a new spot with different temperatures or light levels can stress it out.
- Overwatering or Underwatering: Both of these conditions can cause leaves to fall off. Make sure to water regularly and correctly.
- Low Humidity: The leaves may fall off if the air inside is dry, particularly during the winter months.
1.2 Solutions:
- You should gradually adjust your plant to the new conditions in order to reduce the amount of stress it experiences.
- Keep watering the plants regularly and check the soil’s wetness level often.
- Misting the plant on a regular basis, using a humidifier, or setting the plant on a pebble tray that is filled with water are all things that may be done to increase the humidity levels surrounding the plant.
2. Yellowing Leaves
The yellowing of the leaves of a croton mammy plant may be an indication of a number of underlying problems, which may include nutrient deficits or failure to properly water the plant.
2.1 Causes of Yellowing Leaves:
- Overwatering: Root rot can happen when there is too much water, which stops the roots from receiving nutrients and turns the leaves yellow.
- Nutrient Deficiency: Leaves can turn yellow if they don’t get enough nutrients like nitrogen, potassium, or magnesium.
- Low Light: If the plant doesn’t get enough light, its bright colors can fade, leaving behind pale or yellow leaves.
2.2 Solutions:
- It is important to check the moisture content of the soil and alter your watering schedule so that the plant does not become submerged in water.
- In order to restore the plant’s lack of nutrients and to encourage the growth of healthy foliage, fertilize it with a balanced fertilizer.
- The plant’s color and vitality will be improved if it is moved to a spot that receives indirect light that is brighter.
3. Leaf Browning or Crispy Edges
When the edges of the leaves of a croton mammy plant get brown or crispy, this is often an indication of environmental stress, which is sometimes associated with humidity or watering practices.
3.1 Causes of Leaf Browning:
- Low Humidity: The edges of the leaves can get dry and brown when exposed to dry air, which is more likely to occur in indoor situations.
- Underwatering: If there is not enough water, the plant may become dehydrated, which will result in the leaves becoming brown and crispy edges.
- Fertilizer Burn: A accumulation of salt in the soil can be caused by excessive fertilization, which can cause the roots to become charred and cause the leaf tips to turn brown.
3.2 Solutions:
- By spraying the area around the plant, using a humidifier, or grouping plants together, you can increase the density of the humidity.
- Ensure that the soil is watered on a consistent basis, allowing it to dry out moderately in between waterings but not excessively.
- If there is a possibility that the soil has been over-fertilized, flush the soil with water to eliminate any excess salts.
4. Fading Leaf Color
People love croton mammy plants for their bright, multicolored leaves. If the leaves lose their color and look dull or faded, it could be because they aren’t getting enough light or because of something else in the surroundings.
4.1 Causes of Fading Leaf Color:
- Insufficient Light: To keep their bright colors, croton plants need bright, indirect sunlight. If there isn’t enough light, the colors may fade.
- Nutrient Imbalance: Leaves that are pale or dull can be caused by not getting enough nutrients, especially those that help plants make chlorophyll.
- Aging Leaves: It is normal for leaves to lose some of their color as they get older. It is part of the plant’s life cycle.
4.2 Solutions:
- You should relocate the plant to a spot that receives more light, such as close to a window that faces south or west.
- In order to guarantee that the plant obtains all of the essential nutrients, it is important to fertilize it using a slow-release, balanced fertilizer.
- Cut off old leaves on a regular basis to encourage new, colorful growth.
Outdoor Growing Tips for Croton Mammy
1. Suitable Climates for Outdoor Growth
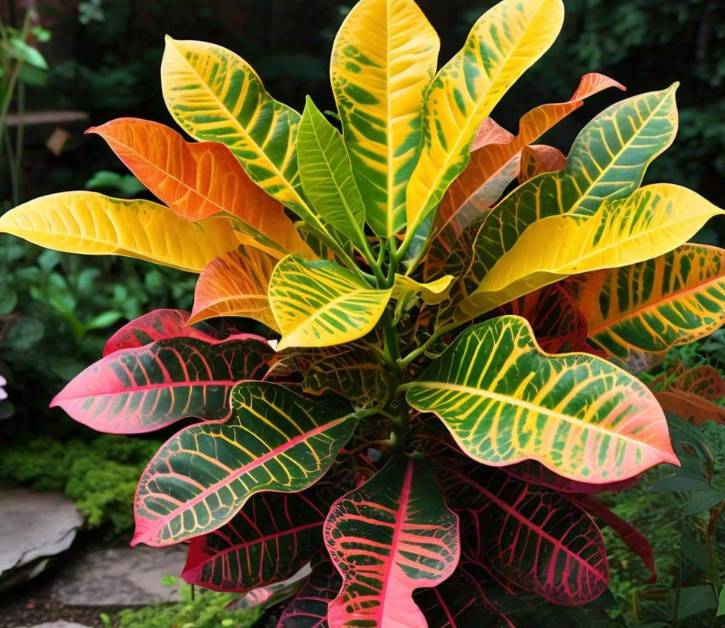
Due to the fact that the croton mammy plant is indigenous to tropical locations, it is able to flourish in environments that are warm and humid. Within USDA hardiness zones 9-11, this plant can be grown outside throughout the entire year if you live in those zones.
1.1 Ideal Outdoor Conditions:
- Temperature: It grows best when it’s between 60°F and 85°F (15°C and 29°C). It can handle warmer weather, but it should be kept away from frost and cold drafts.
- Humidity: The high humidity that is characteristic of tropical climates is preferred. It is possible to help maintain moisture levels by growing outside in an area that is naturally humid or to plant near a source of water.
- Sunlight: It needs bright, shady weather. It can handle some direct sunlight, especially in the morning, but the harsh noon sun should be kept away from it to keep the leaves from getting burned.
2. Planting in the Garden
To ensure that the croton mammy outdoor is successfully planted, it is essential to select the appropriate area and carefully prepare the soil.
2.1 Site Selection:
- You should select a location that has some shade, so that the plant will be able to get bright light without being subjected to the direct sunlight of the afternoon.
- You should make sure that the location is protected from high winds, as they can cause the leaves to become damaged.
2.2 Soil Preparation:
- Compost and other forms of organic matter should be added to the soil in the garden in order to improve drainage and fertility.
- Make sure the pH of the soil is between (PH 5.5 to 7.0), which is slightly acidic to neutral.
2.3 Planting Instructions:
- Dig a Hole: A hole that is twice as big and twice as deep as the root ball of the plant should be dug.
- Amend the Soil: Compost or peat should be mixed with the soil that has been extracted in order to improve drainage and nutritional content.
- Planting: Position the plant in the hole, making sure that the top of the root ball is at the same level as the soil that is surrounding it. Use the soil that has been altered to fill the hole, and then gently press it down around the base.
- Watering: After planting, make sure to give the plant a thorough watering, and then place a layer of mulch around the base to help it retain moisture and resist weeds.
3. Seasonal Care for Outdoor Crotons
In order to maintain their health and vitality throughout the year, croton mammy plants that are grown outside require a variety of different types of care.
3.1 Spring and Summer:
- Watering: In order to keep the soil moist but not saturated, you should increase the amount of watering you do throughout the hot and dry months.
- Fertilization: Fertilize your plant once a month with a well-balanced fertilizer to encourage vigorous development.
- Pest Control: In outdoor settings, it is important to keep an eye out for pests such as spider mites and scale, which can become more frequent.
3.2 Fall and Winter:
- Cold Protection: If you live in an area with a cooler climate, you should protect the plant from frost by either moving it to a sheltered spot or covering it with a towel.
- Watering: As the plant enters a period of dormancy, the frequency of watering should decrease; however, the soil should not be allowed to dry out completely.
- Mulching: Late in the fall, apply a layer of mulch that is more substantial in order to insulate the roots and keep the moisture in the soil over the winter months.
Growing Croton Mammy in a container that can be brought indoors during the winter months is something you should think about doing if you live in an area that is prone to frost.
Designing with Croton Mammy in Landscapes and Containers
1. Landscape Uses
In addition to bringing a splash of color and a variety of textures to gardens, the croton mammy plant is a versatile plant that can be used in a wide range of landscape designs.

1.1 Garden Borders and Edging:
- Colorful Borders: Crotons can be used to create colorful borders along pathways, garden beds, or patios and other outdoor spaces. The vibrant colors of these plants can create a stunning contrast with the green foliage of other plants.
- Mixed Plantings: To make a lush, tropical garden feel, put croton with other tropical plants like hibiscus, canna lilies, or palms.
1.2 Focal Points and Specimen Plants:
- Focal Planting: Croton mammy plant can be used as a focal point in garden beds or large containers if it is selected appropriately. Its striking foliage is a focal point that can serve as a foundation for a garden design.
- Specimen Plant: Crotons should be planted singly in prominent locations within a garden, such as the entrance to the garden or close to a seating area, so that their colors can be appreciated to their full potential.
2. Container Gardening
A common way to grow croton mammy is in containers, especially for people who live in cooler areas or don’t have much garden room.
2.1 Container Selection:
- Size: Pick a container with holes in the bottom that is at least 12 to 18 inches in diameter to keep the contents from getting too wet.
- Material: Terracotta pots are great because they let water drain, which lowers the risk of root rot.
2.2 Container Placement:
- Ensure that the containers are placed in an area that receives bright indirect sunlight. If the plant is maintained inside, you should make sure that it receives a enough amount of light by positioning it close to a window or by placing it under grow lights.
- Wheeled plant stands can make it easy to move containers inside when it’s cooler outside or to change how much sunshine they get.
2.3 Maintenance Tips:
- Watering: Plants in pots dry out faster than plants in the ground, so keep a close eye on the wetness level and water as needed.
- Fertilization: During the growing season, application of a balanced liquid fertilizer that has been diluted to half strength should be performed every 4 to 6 weeks.
2.4 Design Ideas:
- Patio Accents: Crotons can be used in containers to bring color to outdoor spaces such as balconies, decks, and patios. The lush foliage of these plants has the ability to transform any outdoor area into a tropical haven.
- Indoor Displays: Creating a lovely indoor landscape can be accomplished by combining crotons with other houseplants that range in height and texture. Crotons are suitable for usage indoors.
Conclusion: Embracing the Beauty of Croton Mammy Plant
The croton mammy plant is more than simply a vibrant addition to your house or garden. It can turn any room into a bright, tropical paradise with its colorful, twisting leaves and tight growth habit. Whether you’re growing it indoors or as part of a lush outdoor environment, if you know and follow its care instructions, you’ll have a healthy plant that keeps showing off its beautiful leaves all year.
Final Tips for Success
Consistency is Key: Take care of your plant on a regular basis, especially with regard to the amount of water it receives and the amount of light it is exposed to.
Monitor and Adjust: Your plant should be checked on a regular basis for any signs of stress or pests, and any necessary adjustments to its care should be made.
Enjoy the Process: It can be fun and satisfying to grow a croton mammy plant. Take some time to enjoy its beauty and the lively energy it brings to the room.
FAQ’s
-
How Often Should I Water My Croton Mammy Plant?
When the top one to two inches of soil are dry, water your croton mammy plant. The typical frequency for this is once a week during the spring and summer months, and less frequently during the fall and winter months.
-
What Should I Do If My Croton Mammy Is Losing Its Leaves?
Low light, bad watering, or low temperature can all cause leaves to fall off. Change where you put your plant so it gets more light, how often you water it, and use a fan or mist to raise the humidity.
-
Can I Grow Croton Mammy Plants Outdoors?
Yes, croton mammy plants can be grown outside in warm places (USDA zones 9–11). They need soil that drains well and bright, indirect sunlight. Keep them safe from frost if the weather gets cold.
-
How Do I Revive a Dying Croton Mammy Plant?
To bring a croton back to life, make sure it has enough water, light, and air. Remove any dead leaves, check the roots for rot, and repot the plant if needed. Keep the plant somewhere warm and damp.
-
What’s the Best Way to Propagate a Croton Mammy?
Taking stem cuttings is the best way to make more “croton mammy” plants. Cut a healthy stem, take off the lower leaves, dip it in rooting hormone, and then plant it in dirt that is still wet. Leave it in bright, but not direct, light until the roots start to grow.
Read Article


Pingback: Sansevieria Cylindrica Snake Plant - Struggles and Success