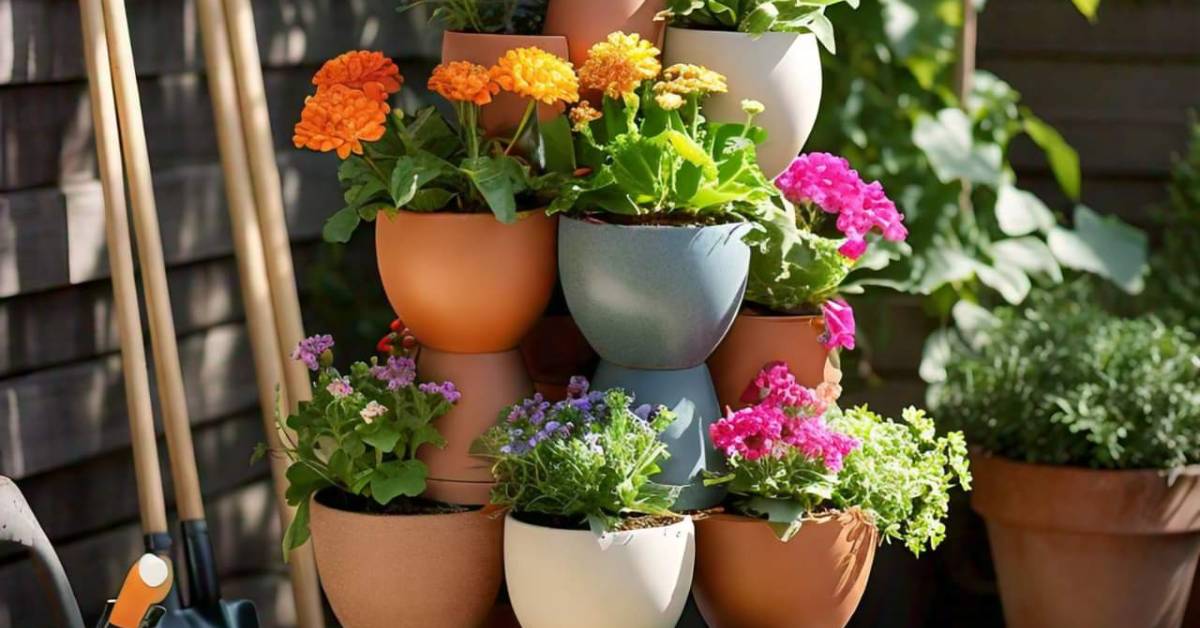
Making stacked flower pots is a great way to make the most of space and make your garden, patio, or even your home look more interesting. You can use stacked flower pots to make the most of vertical space and show off your favorite plants in a creative and compact way, whether you have a big garden or a small balcony. This article will show you step-by-step how to make your own stacked flower pots. It will also give you ideas for plant combinations, how to keep the plants healthy, and how to make sure your project looks great all year.
Why Choose Stacked Flower Pots?
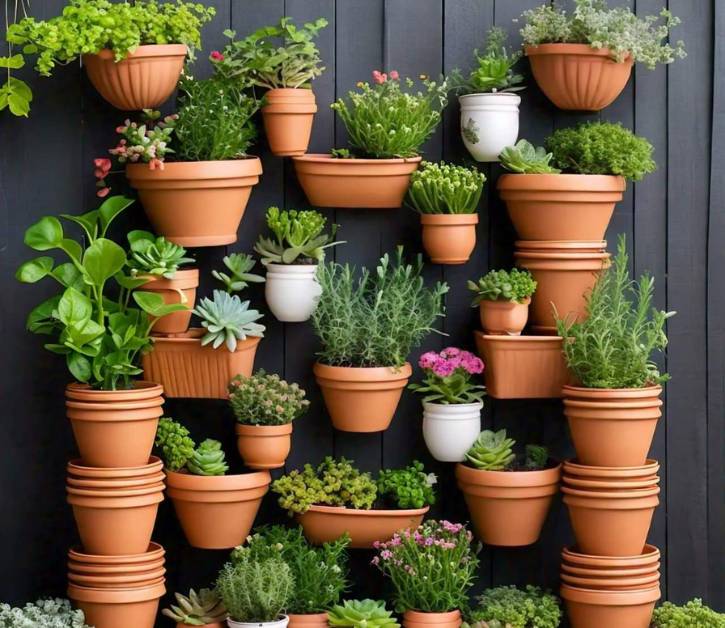
Stacked flower pots are a great way to improve the look of your garden without taking up too much room. This is why stacked flower pots are great for anyone who loves gardening:
- Space-saving: They are great for small patios, balconies, and gardens because they let you grow more than one plant at a time vertically.
- Easy to customize: To make it fit your style, you can pick the number of pots, the plants, and the general look.
- Creative and decorative: Putting flower pots on top of each other can make a statement in your garden by adding height and color.
- Versatile planting: They are useful and pretty because you can put different kinds of flowers, herbs, succulents, and vegetables in them.
Materials Needed for DIY Stacked Flower Pots
In order to get started with the step-by-step guide, you will need to collect a few required components. Garden centers and craft stores are the most common places to find the majority of these items:
1. Basic Materials
- Flower pots in different sizes: Determine the diameters of the pots you want to stack in order to achieve the desired effect. It is possible to use pots made of terracotta, plastic, or ceramic.
- Potting mix: Your plants will do better if you use good planting mix.
- Plants: Based on how you want the pattern to look, pick a mix of flowers, herbs, succulents, or small vegetables.
- Center support: Whether you stack two or more pots, you’ll need a metal or wooden stick or dowel to keep them stable.
- Rocks or gravel: These will be put at the pots’ bottoms to help water drain away.
- Gardening gloves and a trowel: Simple tools for growing and moving the pots around.

2. Optional Materials
- Paint and brushes: If you’d like to add bright colors or shapes to your pots.
- Fertilizer: Slow-release fertilizer helps plants grow over time.
- Decorative accessories: You can give your stacked flower pots personality by adding small garden gnomes, pretty stones, or fairy lights.
Step-by-Step Guide: How to Create Stacked Flower Pots
You can start putting together your stacked flower pots now that you have all the things you need. If you do these things, you’ll have a beautiful, strong building that will help your garden grow.
1. Choose and Prepare Your Pots
Getting the right pots is the first step. You will need at least three pots of different sizes, from big to small. Stacking the smaller pots on top of the bigger ones is the thought behind this step. Make sure that the bottom of every pot you choose (except the very bottom pot) is small enough to fit into the pot below it.
Tip: To keep the layout stable, it’s best to use pots made of heavier materials, like ceramic or terracotta.
If the pots have been used before, clean them really well once you get them. Now is the time to paint or decorate the pots if you feel like it. To make it last longer, use acrylic paint that is waterproof and seal it with a clear outdoor finish.
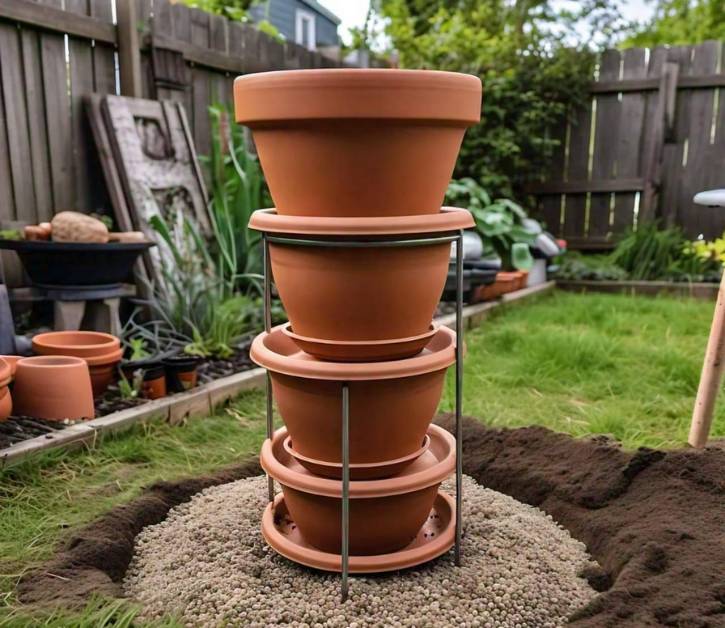
2. Create a Stable Base
It’s important to make sure the bottom pot is stable because it will be the base of your stacked building.
- Add drainage materials: Put some gravel or rocks at the bottom of the biggest pot to help water run away and keep the roots from getting too wet.
- Insert the center rod/dowel: Putting a support rod through the drainage hole of each pot will help keep them stable if you want to stack them. Make sure the rod is stable and in the middle as you push it into the soil in the bottom pot.
3. Stack the Pots
When you have finished preparing your base, it is time to begin stacking the pots:
- Fill the bottom pot: The first (biggest) pot should be filled with potting mix until it is almost completely full. Make sure that the rod in the middle of the pot remains straight while you fill it.
- Place the second pot: The second pot should be taken and carefully slid over the center rod so that it is sitting at an angle on the rim of the bottom pot. Be certain that the soil in the first pot is in touch with the bottom of the second pot.
- Repeat the process: Fill up each pot with soil and stack the next one on top of the last one at an angle until all of the pots are stacked. Make sure the rod stays in place as you go.
4. Plant Your Chosen Plants
Now comes the fun part: putting our seeds! You can pick a number of plants, depending on the size of your pots and your own tastes. Here are some ideas to help you begin:
4.1 Flowers
- Top Pot: Petunias, marigolds, and pansies are some bright annuals that you can plant. At the top of your tower, these flowers will make a bright focal point.
- Middle Pot: If you want to add depth, choose plants that spill over the sides, like trailing lobelia, ivy, or spreading jenny.
- Bottom Pot: Put bigger flowers in the bottom pot, like geraniums, daisies, or zinnias. They will have more room to grow.
4.2 Herbs
- Top: Thin herbs, like thyme or parsley, do best on the top level, where they can get lots of sun.
- Middle: In the middle pots, basil, cilantro, and chives grow well, and some of them spill over the edges.
- Bottom: In the bottom pot, plant hardy herbs like mint, sage, or rosemary. This gives the roots more room to grow.
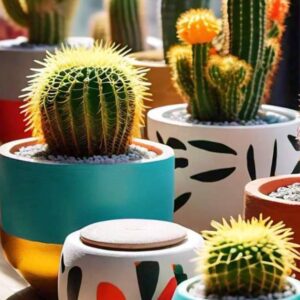
4.3 Succulents
- Top: For the top, put small plants like hens-and-chicks or echeveria.
- Middle: From the middle, trailing plants like string of pearls or donkey tail will look beautiful.
- Bottom: The bottom pot has more room for bigger plants like aloe vera or agave, which do better there.
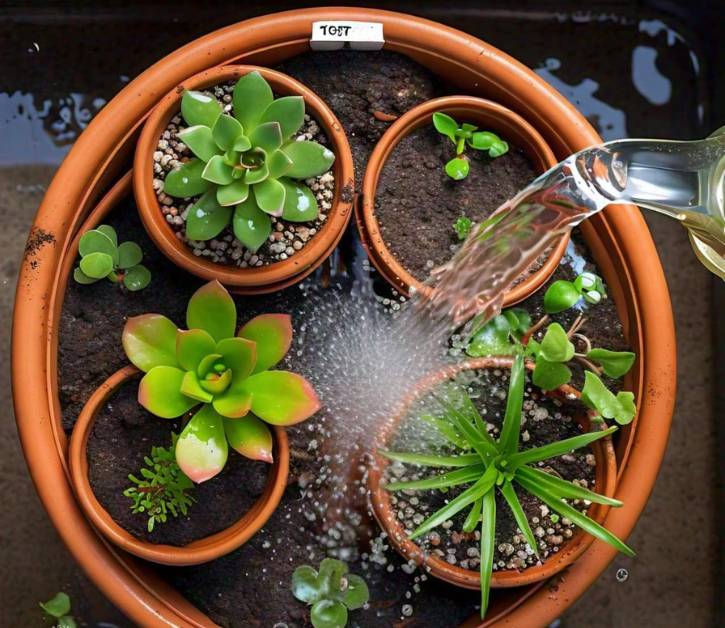
5. Water and Fertilize Your Plants
To ensure that your plants are able to become rooted in the soil, you should give them a good watering once they have been placed. In order to promote healthy development, you should think about applying a slow-release fertilizer if you are going to be using flowers or herbs. Succulents, in general, do not require a great deal of fertilizer; therefore, if you choose to cultivate these drought-resistant plants, don’t use it too much.
Tip: Water your stacked pots from the top so that the water can flow down through them, but be careful not to give them too much water. Pots that drain well can help keep roots from going bad.
Creative Planting Ideas for Stacked Flower Pots
There are a lot of creative ways to use stacked flower pots. Here are some more ideas to help you make your project unique:
1. Seasonal Displays
- Spring: Put tulips, daffodils, and crocuses in your pots to make them look nice in the spring. Put in flowers to make the color last longer.
- Summer: Use bright plants that do well in the summer, like zinnias, sunflowers, and petunias. Basil and oregano are great herbs to grow.
- Fall: For a fall look, use chrysanthemums and ornamental grasses. For extra style, add small pumpkins or gourds to the mix.
- Winter: In the bottom pot, put evergreen plants like dwarf spruce. In the top pots, put winter pansies and ornamental kale to make the garden look nice in the winter.
2. Themed Plant Arrangements
- Tropical Theme: To get a lush and exotic appearance, you can make use of tropical plants such as bromeliads, ferns, and coleus.
- Edible Garden: Plant a variety of herbs and veggies in your stacked pots, like basil, lettuce, spinach, tomatoes, and more. This will make a useful and pretty mini garden.
- Fairy Garden: To make a magical fairy garden, add small models, fairy houses, bridges, and flowers like violas and moss.
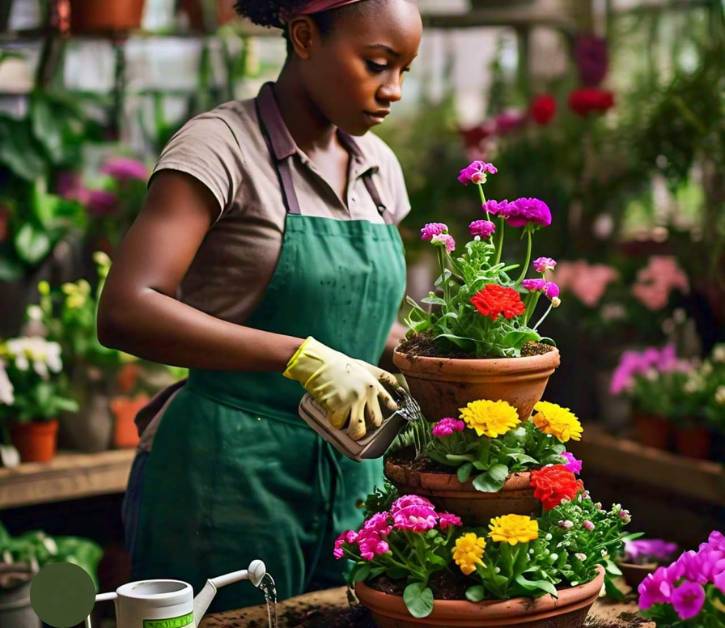
Maintaining Your Stacked Flower Pots
It’s important to take good care of your stacked flower pots after you’ve put them together and placed them. Here’s how to keep your “vertical garden” in great shape:
1. Watering
- Consistent moisture: The top pots of stacked flower pots dry out faster than the rest of the garden beds. Check the soil’s level of wetness often and give it a lot of water when it needs it.
- Avoid overwatering: Make sure the pots can drain well so the roots don’t get too wet. Watering early in the morning or late at night can help keep water from evaporating.
2. Fertilizing
- Slow-release fertilizer: For flowers and herbs that need nutrition all season, use a slow-release fertilizer at the start of the growing season.
- Liquid feed: During the growing season, use a liquid fertilizer once every 2-4 weeks to improve plant health and make blooms look bright.
- Succulent care: Succulents usually don’t need much fertilizer. During their growth season, they only need a light feeding once or twice.
3. Pruning and Deadheading
- Remove dead flowers: Regularly remove the spent flowers from your flowering plants to keep the show looking new.
- Prune as needed: Cut back overgrown or leggy plants to keep things looking neat and tidy. This is especially important for herbs and plants that trail down the ground, as they can get out of control if they aren’t trimmed often.
4. Pest Control
- Keep an eye out for pests: Common plant pests like aphids, spider mites, and slugs can get into stacked flower pots. Look over your plants often for signs of pests.
- Natural pest control: To get rid of pests, use natural treatments like neem oil or soap that kills bugs. You can also bring in good bugs, like ladybugs, to help keep bad bugs in check.
- Preventing fungal issues: Make sure there is enough air flow between the pots to stop fungal diseases that can grow in damp, crowded areas.
5. Seasonal Updates
- Spring and Summer: Your stacked pots will be in full bloom during the warmer months. Make sure you water, fertilize, and remove dead flowers from your plants regularly to keep them healthy and happy.
- Fall: As the weather gets cooler, you might want to switch out your summer annuals for fall plants like pansies, chrysanthemums, or decorative cabbages. Get rid of any plants that are dead and add compost or new potting mix to the soil if it needs it.
- Winter: Some plants might need extra care if you live in a colder area. To protect the roots from frost, you could wrap the pots in burlap or move them inside or to a protected spot.
Best Plant Combinations for Stacked Flower Pots
To make an interesting and well-balanced arrangement in your stacked flower pots, you need to pick the right plant choices. Here are some clever ways to put these things together:
1. Flowers and Foliage
- Top Pot: Petunias or violas (for bright, colorful flowers)
- Middle Pot: Sweet potato plant that trails behind (for contrast and a cascading look)
- Bottom Pot: Zinnias or geraniums (for bigger flowers and brighter colors)
2. Herbs and Edibles
- Top Pot: Thyme or oregano (tight, fragrant plants)
- Middle Pot: Basil or cilantro (herbs that grow quickly and do best in some shade)
- Bottom Pot: Leaf lettuce or spinach (greens that do better in deeper soil and steady watering)
3. Succulent Mix
- Top Pot: Hens-and-chicks or echeveria are small plants that look like rosette structures.
- Middle Pot: String of pearls or donkey tail (for plants that trail)
- Bottom Pot: Aloe vera or agave (which are bigger plants with stronger roots)
4. Pollinator Garden
- Top Pot: Marigolds or lavender (to get bees and butterflies)
- Middle Pot: Nasturtiums or borage (both can be eaten and are good for bees)
- Bottom Pot: Black-eyed Susans or coneflowers (perennials that grow tall and have flowers that last a long time)
Tips for Small Space Gardening with Stacked Flower Pots
Stacked flower pots are a perfect solution for small space gardening, particularly for apartment balconies, urban patios, or regions with limited yard space. Stacking has become increasingly popular in recent years. Here are some ways to get the most out of your “vertical garden”:
1. Use Lightweight Pots
If you want to move your stacked flower pots, don’t use ceramic or terracotta pots. Instead, use lightweight plastic pots. This will make it easier to move them indoors when it’s cold outside or put them somewhere they can get sun.
2. Go Vertical
In situations where space is limited, it is especially crucial to make use of unused airspace, which can be accomplished by stacking pots vertically. Through the use of this method, not only is ground space conserved, but also visual height is created in your garden, which gives the impression that the area is larger and more active.
3. Choose Compact Plants
Look for “compact plant varieties” that can grow without a lot of space on the ground. There are a lot of herbs, succulents, and small flowering plants that do well in small areas. Picking hanging plants for the middle tiers also helps add depth without taking up too much room.
4. Incorporate Hanging Elements
To give your small garden more depth, you could hang planters or connect small pots to vertical surfaces like walls or fences. These hanging accessories can go with your stacked flower pots to make a garden design that looks good and doesn’t take up too much room.
Conclusion
A simple, creative, and inexpensive way to make your garden, patio, or balcony look better is to make stacked flower pots. You can stack pots in a lot of different ways to make your planting arrangements look unique, whether you have limited room or just want to add height and dimension. By using the right pots, plants, and care, you can make a beautiful vertical show that looks great all year.
Stacked flower pots are a flexible way to grow for both new and experienced gardeners. They can be used for “flowers to herbs, succulents to seasonal plants.” If you follow the step-by-step instructions, choose plants that will do well in your climate and style, and water, prune, and care for your pots regularly, you’ll have a beautiful, lush show that saves space and makes your indoor or outdoor space better.
Get your tools together, let your imagination run wild, and start making your own stacked flower pots right now! If you want to brighten up a small balcony or give your garden a striking focal point, these vertical gardens will do the trick. Happy gardeneing!
Read Article

